In this second example we are going to add more features to the simple application we developed in first tutorial. In particular, we will add some interaction with the score: zooming, dragging, and selecting/deselecting objects. You can download the full source code for this example from https://github.com/lenmus/lomse/tree/master/examples/tutorials" target="_blank.
We are going to use the code from example 1 and add more functionality to it. First, let's define the new (arbitrary) specifications:
Having defined the specifications, the first thing to do is to add some variables to store the mouse coordinates. Here are the new additional variables:
//for mouse click & move position
int           m_xMouse;
int           m_yMouse;
Next, we have to modify the main handling loop to include code for dealing with mouse events and keyboard events. But before adding this code, we have to inform X11 that we would like to receive these new events!. For this, we modify the define_events_to_process() function. we will add masks for PointerMotion, ButtonPress, ButtonRelease and KeyPress events. Here is the new code after this modification:
void define_events_to_process()
{
    XSelectInput(m_pDisplay, m_window, PointerMotionMask
                                       | ButtonPressMask
                                       | ButtonReleaseMask
                                       | ExposureMask
                                       | KeyPressMask
                                       | StructureNotifyMask );

}
Now we can proceed adding extra code to the main handling loop. For dealing with key pressed events we add:
case KeyPress:
{
    KeySym key = XLookupKeysym(&event.xkey, 0);
    on_key(event.xkey.x,
           m_flip_y ?
               m_rbuf_window.height() - event.xkey.y :
               event.xkey.y,
           key,
           0);
    break;
}
Basically we get the key code and mouse coordinates when the key was pressed, and pass this information to function on_key() for doing whatever we would like. Let's postpone the code for on_key() and let's continue with changes in the main handling loop.
Next change is adding code for dealing with mouse bottons:
case ButtonPress:
{
    unsigned flags = get_mouse_flags(event);
    get_mouse_position(event);

    if(flags & (k_mouse_left | k_mouse_right))
        on_mouse_button_down(m_xMouse, m_yMouse, flags);

    break;
}

case ButtonRelease:
{
    unsigned flags = get_mouse_flags(event);
    get_mouse_position(event);

    if(flags & (k_mouse_left | k_mouse_right))
        on_mouse_button_up(m_xMouse, m_yMouse, flags);

    break;
}
Tye code for handling button press and button release is similar. First, we invoke function get_mouse_flags(event) to get information about the keys the were pressed when the mouse button was press or released:
unsigned get_mouse_flags(XEvent& event)
{
    unsigned flags = 0;
    if(event.xbutton.state & ShiftMask)   flags |= k_kbd_shift;
    if(event.xbutton.state & ControlMask) flags |= k_kbd_ctrl;
    if(event.xbutton.state & Button1Mask) flags |= k_mouse_left;
    if(event.xbutton.state & Button3Mask) flags |= k_mouse_right;
    if(event.xbutton.button == Button1)   flags |= k_mouse_left;
    if(event.xbutton.button == Button3)   flags |= k_mouse_right;
    return flags;
}
Next, we invoke function get_mouse_position(event) to get the mouse coordinates when the button was pressed or released. The coordinates are stored in the global variables we defined at start:
void get_mouse_position(XEvent& event)
{
    m_xMouse = event.xbutton.x;
    m_yMouse = m_flip_y ? m_rbuf_window.height() - event.xbutton.y
                        : event.xbutton.y;
}
Finally, if a mouse button was pressed/released, we invoke, respectively, function on_mouse_button_down() or on_mouse_button_up() for doing whatever we would like. Again, let's postpone the code for these functions and let's finish with changes in the main handling loop. Another piece of code to add is for dealing with mouse move events:
case MotionNotify:
{
    unsigned flags = get_mouse_flags(event);
    get_mouse_position(event);
    on_mouse_move(m_xMouse, m_yMouse, flags);
    break;
}
As you can see the code is similar to that for handling mouse buttons.
Finally, we will add some code to filter out consecutive mouse motion events. It is a trick to speed up the GUI, by avoiding continuous repaints for very small mouse movements.
//discard all intermediate MotionNotify events
if(event.type == MotionNotify)
{
    XEvent te = event;
    for(;;)
    {
        if(XPending(m_pDisplay) == 0) break;
        XNextEvent(m_pDisplay, &te);
        if(te.type != MotionNotify) break;
    }
    event = te;
}
When a key is pressed, now we will receive and event, and function on_key will be invoked. Let's code this method:
void on_key(int x, int y, unsigned key, unsigned flags)
{
    if (!m_pPresenter) return;

    if (SpInteractor spInteractor = m_pPresenter->get_interactor(0).lock())
    {
        switch (key)
        {
            case 'd':
                spInteractor->switch_task(TaskFactory::k_task_drag_view);
                break;
            case 's':
                spInteractor->switch_task(TaskFactory::k_task_selection);
                break;
            case '+':
                spInteractor->zoom_in(x, y);
                break;
            case '-':
                spInteractor->zoom_out(x, y);
                break;
            default:
                ;
        }

        spInteractor->force_redraw();
    }
}
It's trivial! Just use the Interactor to inform the View about the desired action and, finally, ask the View to update the rendering buffer and redraw the window. But this code is trivial because the specifications fit perfectly on Interactor capabilities. What if we would like to colorize the score? would it be as simple as just invoking:
spInteractor->colorize_score();
Of couse it is not that simple!. But could be in future. Lomse aims at supporting not only document renderization and score playback but also document/score edition. The Interactor is the key object to interact with the document (here the name 'Interactor') and, currently, a lot of functionality is programmed for doing the most common tasks for renderization and playback. But for edition, I has just started. Simple things can be done but not many. As I am developping Lomse as part of the LenMus Phonascus application, Lomse is growing giving priority to Phonascus needs. Currently, all renderization and playback support needed by Phonascus is in place, and I am starting with score edition. If you would like to help, there are many programming tasks for you. Join the Lomse list and post a message. Thank you!
The other important point to remark is the sentence:
spInteractor->force_redraw();
force_redraw() does two things: first, instructs the View to update the rendering buffer and, then, forces Lomse to send a k_update_window_event. Therefore, after updating the rendering buffer, our application will be notified and all the code in place from example 1 will take care of inmediatelly updating the window. That simple!.
As the two mouse tasks, 'selection' and 'score dragging', are currently programmed in Lomse, we can just delegate in the library for dealing with mouse:
void on_mouse_button_down(int x, int y, unsigned flags)
{
    if (!m_pPresenter) return;

    if (SpInteractor spInteractor = m_pPresenter->get_interactor(0).lock())
        spInteractor->on_mouse_button_down(x, y, flags);
}

void on_mouse_move(int x, int y, unsigned flags)
{
    if (!m_pPresenter) return;

    if (SpInteractor spInteractor = m_pPresenter->get_interactor(0).lock())
        spInteractor->on_mouse_move(x, y, flags);
}

void on_mouse_button_up(int x, int y, unsigned flags)
{
    if (!m_pPresenter) return;

    if (SpInteractor spInteractor = m_pPresenter->get_interactor(0).lock())
        spInteractor->on_mouse_button_up(x, y, flags);
}
Again very simple. The key for this simplicity is the Task model build inside Lomse. So for common tasks, such as selction and dragging, your application has practically nothing to do. You only have to take care of designing and programming the GUI and Lomse will take care of everithing else. As said, only tasks for renderization, playback and simple interaction are currently coded in Lomse. But for edition, I has just started.
And this is all. Our application is ready for building and testing. You can download the full source code for this example from https://github.com/lenmus/lomse/tree/master/examples/tutorials" target="_blank.
As usual, your proyect makefile must include the paths for the headers of used libraries: Lomse, X11 and the GNU Standard C++ Library (libstc++). The best way of doing it is by using the pkg-config tool:
`pkg-config --cflags x11` `pkg-config --cflags liblomse` -lstdc++
It will generate something as -I/usr/include/freetype2 -I/usr/include/libpng12 -I/usr/include/lomse.
As to the libraries to link, you only will have to include Lomse and X11. Again, the best way of doing it is by using pkg-config tool. Open a terminal window, move to the directory containing the sample code and enter:
g++ -std=c++11 example_2_x11.cpp -o example-2-x11  \
    `pkg-config --cflags x11` `pkg-config --cflags liblomse`   \
    `pkg-config --libs liblomse` `pkg-config --libs x11` -lstdc++
I didn't say but in method open_document() I've changed the score, replacing the trivial score used in example-1 by a more complex score. When executing example-2 you should see something as:
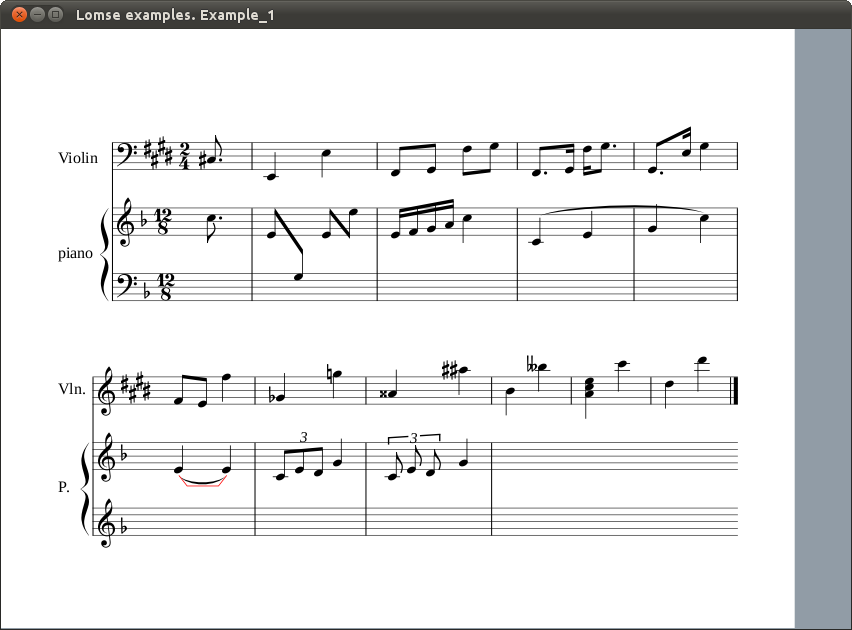
Play with the mouse for dragging the score and for selecting objects. Test zooming by using the keys '+' and '-'.
This document is the last tutorial for Lomse in X11. Sorry but this is all my knowledge about X11 programming. For more complex tutorials please look at wxWidgets tutorials. As wxWidgets is a platform independent application framework, those tutorials should run on most platforms and the key Lomse programming isues should be eassily portable to your specific platform.
If you would like to contribute with more tutorials or by adapting this tutorial for other platforms, you are welcome!. Join the Lomse list and post a message.
Last updated: 2018/01/11